Wednesday, January 27, 2016

Installing the Wamp Server

WAMP (Windows, Apache, MySQL, and PHP) is all in one package which installs the basic programs, you will need to get a localhost running and to be able to build and run PHP scripts and pages. Once the WAMP server installation completes successfully, you have the tray icon for the management of server and all its settings. 

Similarly we have LAMP for Linux and MAMP for Mac OS

Below are the steps to install WAMP to your Windows OS:
  1. Download wamp server from http://www.wampserver.com/en/ 
  2. Select 32 bit or 64 bit package based on your OS You will notice WampServer icon at your download location


3. Double click on the installation package. You will receive a Security Warning after opening WampServer file. It is absolutely normal to run WampServer setup on windows.


4. You will see a standard setup wizard of windows after clicking Run button on security warning dialog


5. You have to agree the license of Wamp Server before selecting installation destination at your windows machine.


6. It is very important step of Wamp Server installation. I recommend installing Wamp Server at the drive other than Windows installation. Suppose your Windows is installed in C drive so you should install Wamp Server on D, E or any other location in hard drive except C drive. I am going to install Wamp Server in D drive. Now you can click on Next button after selecting installation location for Wamp Server


1  7.  When you click on the Next button then a Select Additional Tasks dialog will appear on your             screen,  You can check following options,
                                                               i.      Create a Quick Launch icon
                                                             ii.      Create a Desktop icon

8. Setup is now ready to begin installing Wamp Server on your computer. Click on Install button to start installation of Wamp Server


9. Now your Wamp Server is starting to install on your computer.


1   10. You will receive a dialog for choosing your default browser for Wamp Server. You can choose      your favorite browser for Wamp Server as default, or simply click “Open” if you are not sure about  the installation or executable files of your favorite browser. Wamp Server will choose “Internet  Explorer” as default choice


11. Wamp Server installation has completed now and setup will guide you for Apache configurations in the next steps.
 

12. You will notice a “Windows Firewall” standard dialog while configuring Apache by Wamp Server. (You may not observe this, if your windows firewall is not active). Click on “Allow Access” by leaving default options as such to proceed for PHP mail parameters.


13. After allowing access to Apache server, you are at SMTP server configuration dialog. You can specify the SMTP server and the address mail to be used by PHP when using the function mail().   
I recommend the following values,
SMTP: localhost
Email: Your email address.
You can change this to point to your SMTP server
Click “Next” after putting the above values for the installation final dialog.

14. You have successfully installed Wamp Server  along with Apache, MySQL, PHP, phpMyAdmin and SqlBuddy at your computer.

Click “Finish” to start Wamp Server along with other services. Leave “Launch Wamp Server now” check-box checked to start Wamp Server automatically after installation.


15. Now you can see WampServer icon on the taskbar. WampServer icon has three states.

Red
Yellow
Green

Red:

Wamp Server red icon is showing that WampServer is Offline and no service has been started yet i.e. Apache, PHP and MySQL.


Yellow:

Wamp Server yellow icon shows that Wamp Server is still Offline and any service among Apache, PHP and MySQL has been failed to start.


Green:

Wamp Server is working normal along with all services and your development server is ready to use.


16. It is time to test our WampServer with the installed services of Apache, PHP, MySQL and phpMyAdmin. Please follow the steps to test WampServer at Windows.

Be sure, WampServer icon is green at taskbar
Open your favorite browser
Type:  http://127.0.0.1/ OR http://localhost/
Hit Enter

You have successfully installed Wamp Server on your computer if you have seen the welcome screen of WampServer. You can read Server Configuration at Wamp Server welcome screen.


That's it. Now you have all set to write your PHP MySql application

Saturday, January 23, 2016

Adding a pop up inquiry form to joomla website

Greetings of the Day,

I was working on a website development for one of my customer. The requirement was like this: apart from the contact form, they want one inquiry form on the home page and the side bars. That too a pop up contact form when user clicks the button.

I developed this website using Joomla CMS. So instead of developing this from the scratch, I searched for the available extensions. I came across one beautiful extention which fulfills my requirement. That was " jQuery Ajax Quick Contact for Joomla with Popup Function" from JExtentions which is free. 

1. First you download this extension from the Downloads of JExtentions. 
2. Now login to administrative panel of the Joomla  


3. Select to Extensions in the main menu


4. Click on Manage


5. You will get the below screen. Now you can choose the downloaded module zip file and click on Upload &Install


6. You get the installation Successful message


7. Now go to Modules in the extension of the Main Menu


8. You get the JE Quick contact Module


9. Open it and configure it


10. Select Enable in the Jquery Drop down

11. Select "Pop Up" in display type

12. Enter the pop up button text as you want

13. Update all the configuration as shown in the below image


14. Enter the Recipient's email ID. This is very important. Otherwise the pop up form will not work


15. Select the Position to display the button


16. Now Select as Published in Status

17. Select the Menu Assignment tab and select the pages where this button should be displayed.


18. Now Save&Close the module

19. Go to the website and see this button is displayed


20. Click on this button to see the pop up inquiry form


That's it. Happy Coding !

Friday, January 22, 2016

Fatal error: Allowed memory size of 33554432 bytes exhausted while accessing the Joomla page

I hosted my website on Linux server. While I accessed the Contact us Page of the site I got the below error:
Allowed memory size of 33554432 bytes exhausted (tried to allocate 43148176 bytes) in php

It has given the full path of the php file like public_html//plugins/system/xyz.php and also the line number at which the error has occurred. In my case it was line number 79

This was annoying.  But the solution to fix the above issue is very simple.

You need to open the file which throws the above error. Here it's xyz.php. And go to the line number mentioned in the above error(79). Just above this line add the code mentioned below:

ini_set('memory_limit', '-1');

Instead of restricting the memory usage of the server, this line will unlimit the memory use of the server. Here "-1" will give the required memory. But if you are sure how much memory is required, then you can restrict with that value also

Eg:

ini_set('memory_limit', '128M');

Here we are restricted it to 128MB. You can mention it based on the requirement.

That's it. Happy Coding

Thursday, January 21, 2016

Enabling google's Captcha/recaptcha in Joomla

Captcha’s are parts of a website where you sometimes need to type in a word or recognize the images to prove you're a human. Captchas are a great way to prevent spam activity on your website because most "bots" that attempt to post spam cannot read the letters contained in the captcha image.

For years, using Captcha sites prompted users to confirm they aren’t robots by asking them to read distorted text and type it into a box, like this:


But, Google has released a new API that simplifies the reCAPTCHA experience by just directly asking the users whether or not they are robots. They’re calling it the “No CAPTCHA reCAPTCHA” and this is how it looks:


In this blog, we're going to walk you through the steps for enabling ”CAPTCHA/ReCaptcha”, a popular captcha system from google to our joomla websites.

1.  Log in to your website’s administrator back-end account.


2.  Go to your Plugin Manager. You can find this under the Extensions drop down menu in the top menu or in the Control Panel page.


3.     Edit the Plugin Captcha – ReCaptcha


a) Set Status to Enabled


     b)  Copy and paste the Site Key and Secrete key in their appropriate fields.


o  You will get the Site and Secrete keys by signing in with your Google account (create it if you don't have one) here: Create a reCAPTCHA key
o  Once you have register your website domain, Google will provide your ReCAPTCHA keys.


c)  Click Save & Close    

4.   To enable reCAPTCHA

   a) For Contact forms and the Registration form

 o Go to Global Configuration, and select the Site tab

 o  Choose Captcha - ReCaptcha in the Default Captcha field.


  o Click Save & Close


b)  For the Registration form only

 o Go to the User Manager. You can find it under the Users top menu or in the Control Panel page.

 o  In the Component tab in the Options (Click on options on the right side, you get component tab)


Choose one of the following for the Captcha:
o   Use Default - that is the default setting and follows the Default Captcha field setting in your Global Configuration.
o   None Selected - that setting ignors the Default Captcha setting in Global Configuration. Use it when you want ReCAPTCHA in the Contact forms but not in the Registration form.
o   Captcha - ReCaptcha - Only needed if the Default Captcha in the Global Configuration is set to None Selected but you want the ReCAPTCHA not in Contact forms but in the Registration form.
o   Click Save & Close.

That's it! 

Wednesday, January 20, 2016

Android Studio Installation

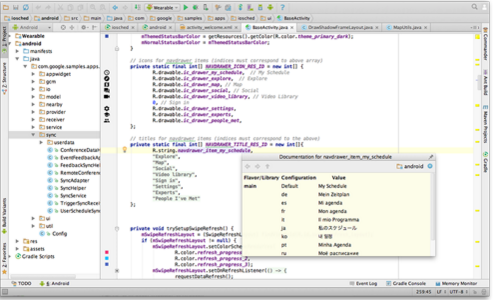
Earlier I used to develop android applications using Eclipse IDE. Recently Google has released their own android IDE called as Android Studio. This is now the official Android IDE. So I installed Android Studio and thought of recording and sharing the steps. Here we go.


Why Android Studio:

1.     Intelligent code editor


At the core of Android Studio is an intelligent code editor capable of advanced code completion, refactoring, and code analysis. The powerful code editor helps you be a more productive Android app developer.

2.     Code templates and GitHub integration


New project wizards make it easier than ever to start a new project. Start projects using template code for patterns such as navigation drawer and view pagers, and even import Google code samples from GitHub.

3.     Multi-screen app development


Build apps for Android phones, tablets, Android Wear, Android TV, Android Auto and Google Glass. With the new Android Project View and module support in Android Studio, it's easier to manage app projects and resources.


    4.  Virtual devices for all shapes and sizes

       
Android Studio comes pre-configured with an optimized emulator image. The updated and streamlined Virtual Device Manager provides pre-defined device profiles for common Android devices.

    5. Android builds evolved, with Gradle
       
Create multiple APKs for your Android app with different features using the same project. Manage app dependencies with Maven. Build APKs from Android Studio or the command line.

More About the Studio:
  • Built on IntelliJ IDEA Community Edition, the popular Java IDE by JetBrains.
  • Flexible Gradle-based build system.
  • Build variants and multiple APK generation.
  • Expanded template support for Google Services and various device types.
  • Rich layout editor with support for theme editing.
  • Lint tools to catch performance, usability, version compatibility, and other problems.
  • ProGuard and app-signing capabilities.
  • Built-in support for Google Cloud Platform, making it easy to integrate Google Cloud Messaging and App Engine.

System Requirements

Windows
Microsoft® Windows® 8/7/Vista (32 or 64-bit)
2 GB RAM minimum, 4 GB RAM recommended
400 MB hard disk space
At least 1 GB for Android SDK, emulator system images, and caches
1280 x 800 minimum screen resolution
Java Development Kit (JDK) 7
Optional for accelerated emulator: Intel® processor with support for Intel® VT-x, Intel® EM64T (Intel® 64), and Execute Disable (XD) Bit functionality

Mac OS X
Mac® OS X® 10.8.5 or higher, up to 10.9 (Mavericks)
2 GB RAM minimum, 4 GB RAM recommended
400 MB hard disk space
At least 1 GB for Android SDK, emulator system images, and caches
1280 x 800 minimum screen resolution
Java Runtime Environment (JRE) 6
Java Development Kit (JDK) 7
Optional for accelerated emulator: Intel® processor with support for Intel® VT-x, Intel® EM64T (Intel® 64), and Execute Disable (XD) Bit functionality
On Mac OS, run Android Studio with Java Runtime Environment (JRE) 6 for optimized font rendering. You can then configure your project to use Java Development Kit (JDK) 6 or JDK 7.

Linux
GNOME or KDE desktop
GNU C Library (glibc) 2.15 or later
2 GB RAM minimum, 4 GB RAM recommended
400 MB hard disk space
At least 1 GB for Android SDK, emulator system images, and caches
1280 x 800 minimum screen resolution
Oracle® Java Development Kit (JDK) 7

Installing Android Studio

Android Studio provides everything you need to start developing apps for Android, including the Android Studio IDE and the Android SDK tools. If you didn't download Android Studio, go download Android Studio now, or switch to the stand-alone SDK Tools install instructions.
Before you set up Android Studio, be sure you have installed JDK 6 or higher (the JRE alone is not sufficient)—JDK 7 is required when developing for Android 5.0 and higher. To check if you have JDK installed (and which version), open a terminal and type javac -version. If the JDK is not available or the version is lower than version 6, download the Java SE Development Kit 7.
To set up Android Studio on Windows:
1.   Launch the .exe file you just downloaded.
2.  Follow the setup wizard to install Android Studio and any necessary SDK tools.  I have installed it on Windows 10. Here are the steps as below:

      
Once you launched Android Studio, it's time to mention JDK path in android studio installer.


             Below the image initiating JDK to android SDK


On some Windows systems, the launcher script does not find where Java is installed. If you encounter this problem, you need to set an environment variable indicating the correct location.

Select Start menu > Computer > System Properties > Advanced System Properties. Then open Advanced tab > Environment Variables and add a new system variable JAVA_HOME that points to your JDK folder, for example C:\Program Files\Java\jdk1.7.0_21.
The individual tools and other SDK packages are saved outside the Android Studio application directory. If you need to access the tools directly, use a terminal to navigate to the location where they are installed. For example:
\Users\<user>\sdk\

Need to check the components, which are required to create applications, below the image has selected Android Studio,Android SDK,Android Virtual Machine and performance(Intel chip).


Need to specify the location of local machine path for Android studio and Android SDK, below the image has taken default location


Need to specify the ram space for Android emulator by default it would take 512MB of local machine RAM


At final stage, it would extract SDK packages into our local machine, it would take a while time to finish the task.


After done all above steps perfectly, you must get finish button and it gonna be open android studio project with Welcome to android studio message as shown below:


You can start your application development by calling start a new android studio project. in a new installation frame should ask Application name, package information and location of the project.

To set up Android Studio on Mac OSX:

1.     Launch the .dmg file you just downloaded.
2.     Drag and drop Android Studio into the Applications folder.
3.     Open Android Studio and follow the setup wizard to install any necessary SDK tools.

If you need use the Android SDK tools from a command line, you can access them at:
/Users/<user>/Library/Android/sdk/

To set up Android Studio on Linux:

1.   Unpack the downloaded ZIP file into an appropriate location for your applications.
2.  To launch Android Studio, navigate to the android-studio/bin/ directory in a terminal and execute studio.sh.
You may want to add android-studio/bin/ to your PATH environmental variable so that you can start Android Studio from any directory.

3. If the SDK is not already installed, follow the setup wizard to install the SDK and any necessary SDK tools.

Note: You may also need to install the ia32-libs, lib32ncurses5-dev, and lib32stdc++6 packages. These packages are required to support 32-bit apps on a 64-bit machine.

Reference: developer.android.com